How to Set Up Pi-hole on a Raspberry Pi
HOMELABPI-HOLE
12/18/20232 min read
Setting up a Pi-hole on a Raspberry Pi is a significant first step in creating a secure homelab, especially for those interested in cybersecurity. Pi-hole goes beyond simple ad-blocking; it offers network-level content filtering, which is crucial for protecting against online threats like phishing and malware. This setup is an excellent way to learn about network management and DNS services. I hated ads anyways...
Introduction
Hardware Used
- Raspberry Pi 3 Model B v1.2 (1GB RAM)
- 32GB microSD card
- Laptop for SSH access to the Pi
Guide
Step 1: Downloading the Raspberry Pi Imager
First, visit Raspberry Pi Software and download the Raspberry Pi Imager for your operating system.
Step 2: Setting Up the Imager
Install and open the Raspberry Pi Imager. Select your Raspberry Pi model and the OS (I chose Raspberry Pi OS) and the microSD card you will use.
Step 3: Configuring OS Settings
A pop-up will ask if you want to configure OS settings like hostname and enabling SSH for headless use. Click EDIT SETTINGS.
Step 4: General Settings
Under the General tab, set your hostname, username, password, timezone, and keyboard. Skip WLAN config if not using Wi-Fi. Remember to use non-default usernames and strong passwords for security.
Step 5: Enabling SSH
In the Services tab, enable SSH for remote access. You can use password authentication for now.
Public Key Cryptography Explained: Public key cryptography is a secure method of communication where you use two keys - a public key and a private key. The public key is shared with others to encrypt messages, while the private key, kept secret, is used to decrypt them. This method is more secure than password-only authentication, as it reduces the risk of password interception or brute force attacks.
Step 6: Additional Options
Under the Options tab, you can choose to have the imager notify you with a sound upon completion and to eject the SD card automatically. You can also enable telemetry to help Raspberry Pi developers improve the software.
Step 7: Writing to the microSD
Click SAVE and then YES to start writing to the microSD. Once done, remove the card from your computer and insert it into the Pi.
Step 8: Connecting the Pi
Connect your Pi to your LAN with an Ethernet cable and power it up.
Step 9: Finding Your Pi’s IP Address
To SSH into your Pi, find its IP address. For most routers, this involves accessing the router's admin panel. On Linux and MacOS, you can run "netstat -nr | grep default" to find the router's IP.
Step 10: SSH into Your Pi
SSH into your Pi using the command:
Step 11: Installing Pi-hole
Run the following commands:
Follow the on-screen instructions to complete the setup.
Step 12: Configuring Pi-hole
Choose Quad9 as your DNS provider for privacy and security. You can add blocklists and enable the web GUI for easier management.
Step 13: Finalizing Installation
Set up a web server if needed and decide on your logging preferences.
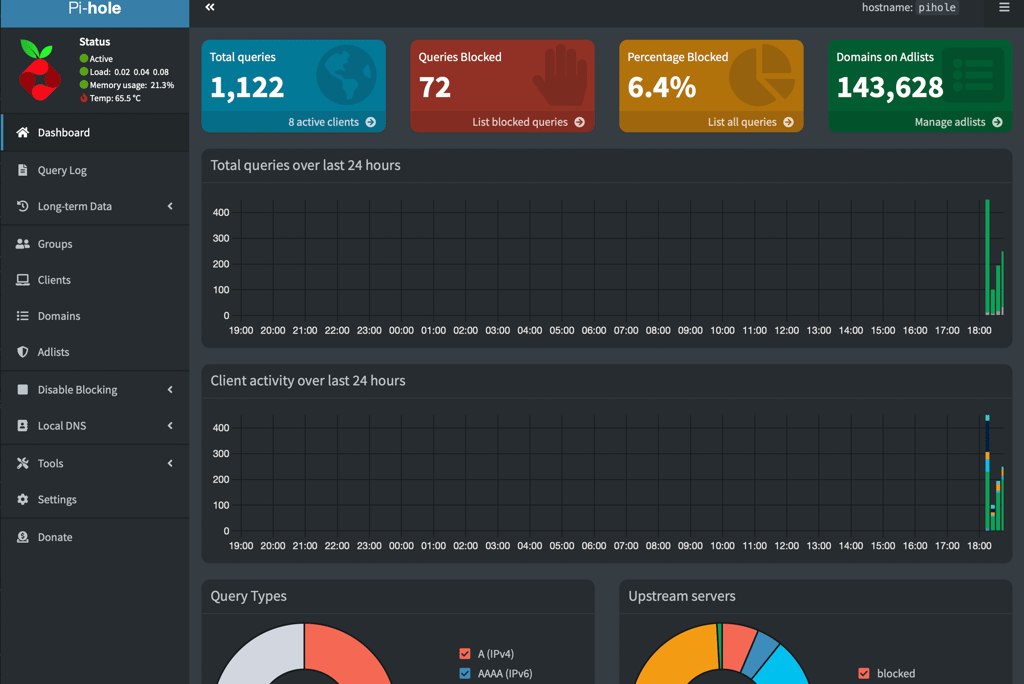
Step 14: Accessing Pi-hole Dashboard
Log into the Pi-hole admin page using the provided URL and password.
Step 15: Configuring Your Network
Tell your network to use Pi-hole as the DNS server. This can be done via your router's admin panel.
Once all of this is done your dashboard should be populating with information: